Tuesday, August 18, 2009

Happy Birthday to my boy!

My assignment is to make a train birthday cake and get it ready on 20th August 2009!

My younger son (soon-to-be 2-year-old) loves "Thomas & His Friends" and by calling his name, he will not respond to you. But if you mention the characters' name, e.g. James, Thomas, Percy, Gordon, Henry and so on... .or "Tuuut tuuUuuut... ding3 dong3 ding3 dong3" sound, he will quickly come to you :)

I plan to make James Birthday Cake and these are my challenges:

  1. What cake to bake? It must be firm enough to allow me cut and form James.

  2. What decoration? I feel like just James alone will be too "lonely", should I also make the grass, railway (too tough :P) and

  3. When to bake the cake and do the decoration?


Hhahaaa.. I wanted to form a JAMES' look train, but end up, this is how my boy's train looks like, I felt that it looks like truck or bus :P

FRONT:


BACK:


SIDE:


It was a dark chocolate layered glazed cake. My husband and I went to buy the candies to decorate the train =)

The most important thing is, my son loves it! He said "tuuuu tuuuu, ding dong ding dong" when he first saw the cake and he keep kissing the cake ^.^ I'm contented =)

Monday, August 17, 2009

Coffee and Cookies Brownies

I like this and I finally found it!

Sad thing is, the brownie mixture was bought from Carrefour and so, the recipe still a mystery... I will try out other recipe and see if I can solve the mystery not =)

Here's the whole piece before cutting into pieces:


This is after cutting into pieces:


A piece of delicious-yummy brownie:


All I did was make the sugar cookie dough, add oil, eggs, coffee (I put espresso) and chocolate pieces. I also added walnut.

I tried adding crispy rice in a small amount of the brownie and bake separately. End result, ehhh.. not crispy but not too hard to chew. Hahahaa.. so, will not try next time :P

The sweetness is just nice (to me and my family), the chewiness is perfect, not too hard nor too cakelike.

Friday, August 14, 2009

The making of Pandan Chiffon Cake


Measurement Tools:

  • Spoon for soup or we call it soup spoon/tablespoon (tbsp, I found out this after reading recipes in internet, :P)

  • Spoon for tea or we call it teaspoon (tsp)


Ingredients:

  • 7 eggs, see below for details.

  • 7 tbsp of cooking oil

  • 7 tbsp of caster sugar

  • 7 tbsp of plain flour/all-purpose-flour

  • 7 tbsp of (coconut milk + pandan juice)
     You may pound the pandan leaves by adding a bit of coconut mik, then squeeze the pandan. Alternatively, omit the pandan leaves and add 1 teaspoon of pandan flavour/paste and a little green colouring.
    OR, for orange flavour, replace coconut milkt+pandan juice with 7 tbsp of fresh orange juice (You may add orange zest as well).

  • 1/3 teaspoon of baking powder

  • 1/3 teaspoon of baking soda

  • 1/3 teaspoon of cream of tartar


Step-by-step:

  1. Get a small bowl and a medium bowl. Crack the egg into the small bowl, use your soup spoon/tablespoon to scoop the egg yolk and put in the medium bowl. Pour the egg white into the mixing bowl. Repeat this step for the rest of the eggs. DO NOT leave any egg yolk in the egg whites bowl.

  2. In the mixing bowl (with the egg whites), add caster sugar and cream of tartar. Beat till white, thick and creamy. We will name this Mixture_A.

  3. Preheat oven to 150C and put in the chiffon pan for 5-10 minutes. This is to heat up the pan.

  4. While the beating and heating in progressing, mix plain-flour/all-purpose-flour, baking powder and baking soda together and sieved.

  5. Add cooking oil and coconut milk (with pandan juice/flavour) to medium bowl (with egg yolks), lightly beaten (you may use a fork to do so). Let's name this Mixture_B.

  6. Once the Mixture_A is done (check tips for details), add half of the sieved-flour into the mixture and followed by half of the Mixture_B. Whisk (check tips for details) slowly until well combined. Repeat this step for the other half of sieved-flour and Mixture_B.

  7. Take the hot chiffon pan out from oven, pour in the cake mixture into the pan and slightly shake the chiffon pan to allow mixture spread evenly.

  8. Baked chiffon cake for 30 minutes @ 150C. Then, continue for another 10 minutes @ 180C. Do put in the aluminum foil on top of the cake as a 'cover' @ the 35th-minutes to avoid the cake gets burnt.

  9. Tick-tack-tick-tack, ting! Once it's done. Remove the cake from oven and quickily invert it to avoid 'sinking' :) let it cool before unmold, cut and enjoy!


Good-to-know Tips:

  1. My recipe is based on normal chiffon pan. If your chiffon pan size is larger, add ingredients from 7 to 8. You may still use the same amount of the baking powder, baking soda and cream of tartar.

  2. How you know the egg white+caster sugar+cream of tartar is really done? When you flip the mixing bowl up-side-down, trust me, the mixture will not drop! It will take roughly 5-7 minutes of beating. Do not beat too long as your cake will tender to "explode" :) I proved it and you can see from the slideshow above. I need to do the photo-ing, so I let the machine beat the egg whites for a little longer :P

  3. Let it cool completely before unmolding, normally I let it 'alone' for 2 hours =) Reason being, without cooling down completely, the cake tends to be 'broken into pieces' easily or stick with the pan when you unmold.

  4. Whisk whisk whisk, what's it? Navigate to google.com and perform image search for 'whisk', you should be able to see how it looks like =)


click here to see a no-crack pandan chiffon cake, result from "just-nice" beating ^.^

Thursday, August 13, 2009

Butterfly Chocolcate Cake

I came across a website that show a lot of videos on how to make kids birthday cakes and this attracted me to visit and navigate around for the cakes' design =) There's my son's favorite TRAIN, my daughter's favorite BUTTERFLY, and I like the DINOSOUR :)

So I decided to try making my 1st frosting/icing and 1st chocolate cake. Then my daughter wanted to join in for frosting the cake and in-charge for the decoration =)

The result:


My daughter decorated this butterfly cake together with my maid from 10PM till 11PM plus and she still feeling excited for the cake. After me nagging for many times (cause tomorrow is school day), she finally went to bed with the happy adventure :)

We kept the cake in the fridge for 1 day so that it's easier to handle and it takes 2 hours to let the cake frosting set before the decoration. We cut the cake the next day @ 8PM cause we want everyone to see the cake first before "destroying" it :P

The cake was too sweet for me, but my maid loved it! And my daughter only aim for the frosting and candies on top :P The texture was a bit hard even after we took it out for 30 minutes :P The purpose of the cake is to try out the frosting and decoration, so I just grab any chocolate cake recipe from internet without much research/survey :P

If you are interested, kindly do a search @ google.com for butterfly birthday cake video. It should be the 1st result from howdini =) Enjoy!

Wednesday, August 12, 2009

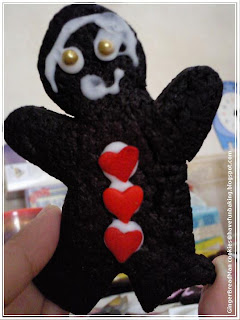
1st Cookies Production - GingerBreadMan cookies

1st cookies on new microwave over bought few days ago and this is the reason why we bought the microwave oven --> My daughter wanted to bake this cookies and decorate it!

It was really hard and I suppose that will allow us to decorate it easily without breaking it into pieces. Taste of molasses turn me off :P To those who like the taste of molasses, you should try this.

This is the gingerbreadman cookie decorated by my daughter, simple and nice. -->


<-- This decorated by myself, too fanciful and I just want to try out all the sprinkles that I've bought :P

Almond Walnut Espresso and Chocolate Coins

Is it taste like espresso or chocolate then? hahahhaaa.. confuse with what I named the cookies? Here's why:

I split the dough into 2 part and put cocoa powder for 1 part and espresso powder for another one =) So I can enjoy 2 different taste of cookies.

The cookies was so "fragile" and taste-wise... ermh.. I like the espresso and the chocolate one just normal =)

Let's take a look on the picture I took -->
my maid actually helped to put the chocolate glazed :P The slightly darker color, 3 from the left are chocolate coins.

And also, why walnut and almond? Cause I didn't have enough almond, so I added walnut :)

Made this on National Day too! 09 Aug 2009.

Chocolate Chips and Raisin Cupcakes

This is a wait and wait and wait cupcakes. Why? Because the recipe told me so :P

Yeast was part of the ingredient and it takes time to react on the mixture.
So, I mixed the first batch of ingredients, cover with cling wrap and let it rest for more than 45 minutes. The recipe stated only rest for 45 minutes and I let it rest more than that because I went to NTUC Fair Price with my husband and kids to buy something :P hahahahaa... I can't just sit there to wait for the yeast to do the job right?

By the time I reach home, the mixture was double in bulk, which it was meant to be :)

Then, I combined raisin, chocolate chips and some melted baking chocolate chips that was cut into small pieces. The recipe instructed to let the mixture to rest for a while again, but I didn't as I think I let it rest enough :P So, I applied the beaten egg on top of the cupcakes and baked @ 200C for 20 minutes. Yes! I read the recipe 3 times to confirm on the heat and timing, it's really 200C and 20 minutes, kind of high heat and long timing compare to what I've baked so far.

The taste as in sweetness was just right. BUT, it's kinda dry and when you have a bite together with the raisin, it felt like you chewing some 'moist' dessicated coconut :P hahahaaa, not sure where went wrong, maybe my mistake for not letting the mixture to rest for the 2nd time after combing the raisin and chocolate chips. :P Will try again and see if I can fix this =)

Why I use 'some melted baking chocolate chips and was cut into small pieces (since it was melted already)'?

I melted this baking chocolate chips wrongly for the crispy cookies (I should have used chocolate couvertures for the crispy cookies) and I felt that it would be wasted to throw away. So I cut it into a small pieces (it was kept in the fridge, so I have to cut into small pieces) and added into this cupcakes, That's why you can notice there's big pieces of chocolate in the cupcakes =P

Baked on 10 Aug 2009.

Tuesday, August 11, 2009

Espresso Brownie

I don't really like the texture as it's not what I wanted. Initially, I wanted the texture to be similar to the Coffee Bean Chocolate Brownie, but 1st attempt failed =(

However, the strong smell of espresso and cute chocolate chips on the surface attracted many people around and it was "vanished" from the tupperware after 2 days.... not bad also huh =)


I will definitely get the 2nd try for this, but with another brownie recipe ^.^

Baked on 07 Aug 2009.

Chocolate-Glazed Tart

After getting a bite of this Chocolate-Glazed Tart, my brother said this "我不舍得吞下去,想要咬多几下,让它多待在嘴里多一回儿"

I feel happy, of course. It means it was so tasteful that he was "unwillingness" (don't know got such word or not) to swallow it, want to let it stays in the mouth, chew for a little while..."

Here's what he keep asking me to do it again:

Sorry for the quality of the image as one of the light-pulp was spoilt that day and it was night-time already.

After applying the chocolate-glaze, you can notice the skin/surface is smooth now:


This is the end product, after glazed and kept in fridge for a day and removed from the fluted tart pan:


You can see that there's finger print on the surface of the slice of tart :P that's my daughter's naughty finger, she thought that the chocolate was melted and she can taste it without my knowledge :)

Not bad for the 1st attempt on 24 Jul 2009 huh ^.^

This is 2nd attempt on 6 Dec 2009:


I didn't let the based go up to the side for this round ^.^

Pandan Layered Cake & the making of

Chinese people always say "乱乱来", Singaporean says "don't play play"... and while baking this Pandan Layered Cake, I was like combination of both, first I "don't play play", carefully follow each steps based on the recipe, but at the end, I "乱乱来" already because dinner time and kids having a "war" at the living room. I gotta finish up everything and help to feed the hungry-monsters!

Here's the result:


The end product is what Hokkien people always say "buey-pai leh..". It's delicious-yummy!!! (I will share the recipe later) Although the skin is not as presentable as it should be, which I suppose to apply the dessicated coconut/coconut flakes but I couldn't find it at the shop downstairs :P But "watlau-eh", as long as it taste nice, "bor-chap arh"....

Btw, I'm not hokkien, neither Singaporean.

From then... I love to follow the recipe from Agnes Chang.

Baked on 02 Aug 2009.


%%%%%%%%%%%%%%%%%%%%%%%%%%%%%%%%%%%%%%%%%%%%%%%%%%%%%%%%%%%%%%%%%%%%%%%%%%%%%%%%%%%%%%%%%%%%%%%%

THE MAKING OF...


On 11th August 2009 (Tuesday night), I was assigned to prepare birthday cake for grandma-in-law's 83-year-old birthday celebration. I was stressed cause I'm newbie ler... So, I called up to aunt (my husband's 姑姑, grandma-in-law's daughter) and asked what is it all about.

So, after clarifying with her (she said since I was practicing on baking, so can bake for ahma lor...), I decided to make 2 pandan layered cakes. Why this cake? Cause I can't really make chiffon cake to bring over cause it's too simple (although it's yummy) and pandan layered cake was the only choice that I've tried so far.

The look was nice, the taste was commented to be too sweet :P hahahaa, cause I thought it should be put in the fridge before serving as the sweetness will not be too much when it's cold. And my dear grandma-in-law loves sweetness.

But end up we took it out earlier at the restaurant checking how many candles we need to put lar, how do we need to serve lar... bla bla bla.. then birthday song lar... then photo taking lar..... hahahaa..and there's go the sweetness. And even my grandma-in-law also asked "ehh.. why so sweet arh?" :P

I will remember not to add more sugar next time as I forgot there were lot of kids around also, shouldn't have done so, not good for them.


%%%%%%%%%%%%%%%%%%%%%%%%%%%%%%%%%%%%%%%%%%%%%%%%%%%%%%%%%%%%%%%%%%%%%%%%%%%%%%%%%%%%%%%%%%%%%%%%


Cornflakes+Crispy Rice Dark Chocolate Cookies

Hahahaa.. I invented this cookies myself for my daughter on the National Day, 09 Aug 2009 =)

She loves chocolate and especially dark chocolate. But I try not to give her a big piece of the Cadbury Dark Chocolate, which she always says "mommy, I want a medium piece one, not a small one"

So, I decided to make something out of the dark chocolate so that she can enjoy the chocolate yet easy for her to bite (she is 4 year-old and she doesn't like bite too crunchy things like peanut, she said too hard and very tired biting it).

Take a look of the 1st cornflakes+crispy rice dark chocolate cookies that I've made for her, not much effort and she is helping by licking clean the spoon that I used to scoop the cookies mixture to the tray.


I choose cornflakes because I bought it few weeks ago that I thought of giving her as breakfast, but she always "mommy, I want to sleep 5 more minutes". So, do not have much time to enjoy this as she need to catch the transport to her childcare @ 8:20AM:


Some background...
I wake her up every morning @ 7:45AM by giving her milk in a bottle, yes she still bottle-feed. WHILE half-sleeping-half-drinking her milk, she will 'somehow' finish it @ 8:00AM. Then she will crawl down the bed with her eyes half-close, dragging her body to toilet --> wash face, brush teeth and dress up (ops! before that, pass-urine) and want me to tie up her hair nicely.
So, by the time everything settled, it was and will be 8:20AM (sometimes plus bit bit, means we are late!).


Walnut Chewy Chocolate Chips Cookies

Yes, I mean it and I swear! It's really chewy!

I love the double-chocolcate-chips chewy cookies from Subway and I always wanted to bake this kind of cookies one day, at least I don't have to pay so much for a piece of cookie.

So, I decided to try it out. And yes, for the 1st time I baked chewy cookies.

The outcome is delicious-yummy! BUT... take a look of the pictures that I've taken with my mobile phone :P Not sure if you dare to try it out or not.


The SIZE, and this is the 1st piece of cookie that I formed in the tray :P
I just dropped a spoonful of cookies dough, imagine the amount of rice that you will put in your mouth, not too big, juUuuust---niceeee...And the end result is:


But I guarantee you, you will not regret trying to bake this cookies IF AND ONLY IF you are a fan of chewy cookies!

Baked on 24 Jul 2009.


** Recipe posted upon request from Blessed Homemaker, thanks for visiting:
** Recipe adapted from allrecipes ^.^


Ingredients

* 2C all-purpose flour
* 1/2t baking soda
* 1/2t salt
* 3/4C unsalted butter, melted
* 1C packed brown sugar **
* 1/2C white sugar **
* 1T vanilla extract
* 1 egg
* 1 egg yolk
* 1 3/4C semisweet chocolate chips
* 1/2C or 3/4C walnut, chopped


Directions

1. Preheat the oven to 325 degrees F (165 degrees C). Line with parchment paper.

2. Sift together the flour, baking soda and salt; set aside.

3. In a medium bowl, cream together the melted butter, brown sugar and white sugar until well blended. Beat in the vanilla, egg, and egg yolk until light and creamy. Mix in the sifted ingredients until just blended. Stir in the chocolate chips & chopped walnuts by hand using a wooden spoon. Put in the fridge for 1-2hours. Drop cookie dough spoonful at a time onto the prepared cookie sheets. Cookies should be about 3 inches apart cause it will spread. (That's how I got palm-size cookies)

4. Bake for 13 to 15 minutes in the preheated oven, or until the edges are lightly toasted. Cool on baking sheets for a few minutes before transferring to wire racks to cool completely.***

** I reduced the brown sugar to 3/4C and white sugar to 1/3C cause we got chocolate chips already, it would be too sweet for me. You may adjust accordingly ^.^


*** Once it's golden brown, can take out from the oven le, I found that you will get crispy cookies instead of chewy if overcook ^.^ It will be soft in the middle, but once cool down, you'll love its chewiness!


1st Cake Production - Pandan Chiffon Cake & the making of

If you ask me "Is this really your 1st attempt baking chiffon cake?". My answer would be Yes and No.

Reason why, I remembered helping my mother baking this chiffon cake 20 years ago. Basically helping her to prepare the ingredients and do the "manual whisking" (no machine). So, I gained a lot of experience.

So, few days after buying the microwave oven (after I baked the gingerbreadman cookies that I've promised my daughter), I decided to try something that I feel confident with... familiar with.. dang dang dang dang... here you go, my Pandan Chiffon Cake. And most importantly, I do not need measurement cups or measure ingredients in grams, ml, etc. My mommy just use soup spoon and teaspoon =)


This is the look after cutting into pieces.


Looks nice, taste nice and it only lasted for 2 days. I was surprised that the next day after coming back from work, the cake tray only left 2 pieces of the cake :P

Baked on forgot liao, i think early Jul 2009.


Note added on 12 Aug 2009: My 82-year-old grandma-in-law always prompts this question to me "why today you didn't bake pandan cake?"

I will try to bake pandan cake as often as possible, making it available all the time in the cake tray =)


%%%%%%%%%%%%%%%%%%%%%%%%%%%%%%%%%%%%%%%%%%%%%%%%%%%%%%%%%%%%%%%%%%%%%%%%%%%%%%%%%%%%%%%%%%%%%%%%

THE MAKING OF...


Measurement Tools:

  • Spoon for soup or we call it soup spoon

  • Spoon for tea or we call it teaspoon


Ingredients:

  • 7 eggs, see below for details.

  • 7 soup spoon of cooking oil

  • 7 soup spoon of caster sugar

  • 7 soup spoon of plain flour/all-purpose-flour

  • 7 soup spoon of (coconut milk + pandan juice)
     You may pound the pandan leaves by adding a bit of coconut mik, then squeeze the pandan. Alternatively, omit the pandan leaves and add 1 teaspoon of pandan flavour/paste and a little green colouring.

  • 1/3 teaspoon of baking powder

  • 1/3 teaspoon of baking soda

  • 1/3 teaspoon of cream of tartar


Step-by-step:

  1. Get a small bowl and a medium bowl. Crack the egg into the small bowl, use your soup spoon to scoop the egg yolk and put in the medium bowl. Pour the egg white into the mixing bowl. Repeat this step for the rest of the eggs. DO NOT leave egg yolk in the egg whites bowl.

  2. In the mixing bowl (with the egg whites), add caster sugar and cream of tartar. Beat till white, thick and creamy. We will name this Mixture_A.

  3. Preheat oven to 150C and put in the chiffon pan for 5-10 minutes. This is to heat up the pan.

  4. While the beating and heating in progressing, mix plain-flour/all-purpose-flour, baking powder and baking soda together and sieved.

  5. Add cooking oil and coconut milk (with pandan juice/flavour) to medium bowl (with egg yolks), lightly beaten (you may use a fork to do so). Let's name this Mixture_B.

  6. Once the Mixture_A is done (check tips for details), add half of the sieved-flour into the mixture and followed by half of the Mixture_B. Whisk (check tips for details) slowly until well combined. Repeat this step for the other half of sieved-flour and Mixture_B.

  7. Take the hot chiffon pan out from oven, pour in the cake mixture into the pan and slightly shake the chiffon pan to allow mixture spread evenly.

  8. Baked chiffon cake for 30 minutes @ 150C. Then, continue for another 10 minutes @ 180C. Do put in the aluminum foil on top of the cake as a 'cover' @ the 35th-minutes to avoid the cake gets burnt.

  9. Tick-tack-tick-tack, ting! Once it's done. Remove the cake from oven and quickily invert it to avoid 'sinking' :) let it cool before unmold, cut and enjoy!


Good-to-know Tips:

  1. My recipe is based on normal chiffon pan. If your chiffon pan size is larger, add ingredients from 7 to 8. You may still use the same amount of the baking powder, baking soda and cream of tartar.

  2. How you know the egg white+caster sugar+cream of tartar is really done? When you flip the mixing bowl up-side-down, trust me, the mixture will not drop! It will take roughly 5-7 minutes of beating. Do not beat too long as your cake will tender to "explode" :) I proved it and you can see from the slideshow above. I need to do the photo-ing, so I let the machine beat the egg whites for a little longer :P

  3. Let it cool completely before unmolding, normally I let it 'alone' for 1-11/2 hours =) Reason being, without cooling down completely, the cake tends to be 'broken into pieces' easily or stick with the pan when you unmold. However, if you try to let it cooled too long, you can feel the cake is "wet" when trying to cut/unmold.

  4. Whisk whisk whisk, what's it? Navigate to google.com and perform image search for 'whisk', you should be able to see how it looks like =)


%%%%%%%%%%%%%%%%%%%%%%%%%%%%%%%%%%%%%%%%%%%%%%%%%%%%%%%%%%%%%%%%%%%%%%%%%%%%%%%%%%%%%%%%%%%%%%%%